在本章中,我们将讨论Angular 6中的服务.
我们可能会遇到需要在页面的任何位置使用某些代码的情况.它可以用于需要跨组件共享的数据连接等.服务帮助我们实现这一目标.通过服务,我们可以访问整个项目中其他组件的方法和属性.
要创建服务,我们需要使用命令行.相同的命令是 :
C:\projectA6\Angular6App>ng g service myserviceCREATE src/app/myservice.service.spec.ts (392 bytes)CREATE src/app/myservice.service.ts (138 bytes)
文件在app文件夹中创建如下 :
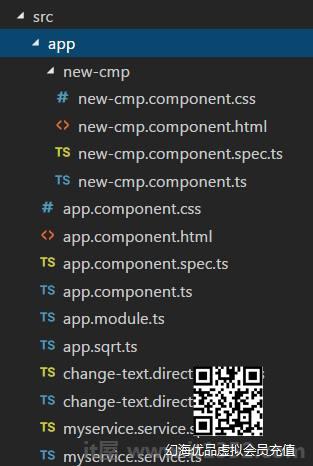
以下是在底部创建的文件 - myservice.service.specs.ts 和 myservice.service.ts .
myservice.service.ts
import { Injectable } from '@angular/core';@Injectable()export class MyserviceService { constructor() { }}在这里, Injectable模块从 @ angular/core 导入.它包含 @Injectable 方法和一个名为 MyserviceService 的类.我们将在这个类中创建我们的服务功能.
在创建新服务之前,我们需要包含在主父 app.module.ts 中创建的服务. .
import { BrowserModule } from '@angular/platform-browser';import { NgModule } from '@angular/core';import { RouterModule} from '@angular/router';import { AppComponent } from './app.component';import { MyserviceService } from './myservice.service';import { NewCmpComponent } from './new-cmp/new-cmp.component';import { ChangeTextDirective } from './change-text.directive';import { SqrtPipe } from './app.sqrt';@NgModule({ declarations: [ SqrtPipe, AppComponent, NewCmpComponent, ChangeTextDirective ], imports: [ BrowserModule, RouterModule.forRoot([ { path: 'new-cmp', component: NewCmpComponent } ]) ], providers: [MyserviceService], bootstrap: [AppComponent]})export class AppModule { }我们已经使用类名导入了Service,并且在提供程序中使用了相同的类.现在让我们切换回服务类并创建一个服务函数.
在服务类中,我们将创建一个显示今天日期的函数.我们可以在主要父组件 app.component.ts 中使用相同的函数,也可以在我们在前一章中创建的新组件 new-cmp.component.ts 中使用相同的函数.
现在让我们看看该函数在服务中的外观以及如何在组件中使用它.
import { Injectable } from '@angular/core';@Injectable()export class MyserviceService { constructor() { } showTodayDate() { let ndate = new Date(); return ndate; }}在上面的服务文件中,我们创建了一个函数 showTodayDate .现在我们将返回创建的新Date().让我们看看如何在组件类中访问此函数.
app.component.ts
import { Component } from '@angular/core';import { MyserviceService } from './myservice.service';@Component({ selector: 'app-root', templateUrl: './app.component.html', styleUrls: ['./app.component.css']})export class AppComponent { title = 'Angular 6 Project!'; todaydate; constructor(private myservice: MyserviceService) {} ngOnInit() { this.todaydate = this.myservice.showTodayDate(); }}默认情况下,在创建的任何组件中都会调用 ngOnInit 函数.如上所示,从服务中获取日期.要获取服务的更多详细信息,我们需要先在组件 ts 文件中包含该服务.
我们将在中显示日期. html 文件如下所示 :
{{todaydate}}现在让我们看看如何在创建的新组件中使用该服务.
import { Component, OnInit } from '@angular/core';import { MyserviceService } from './../myservice.service';@Component({ selector: 'app-new-cmp', templateUrl: './new-cmp.component.html', styleUrls: ['./new-cmp.component.css']})export class NewCmpComponent implements OnInit { todaydate; newcomponent = "Entered in new component created"; constructor(private myservice: MyserviceService) {} ngOnInit() { this.todaydate = this.myservice.showTodayDate(); }}在我们创建的新组件中,我们需要先导入我们想要的服务并访问方法和属性相同.请参阅突出显示的代码. todaydate在组件html中显示如下 :
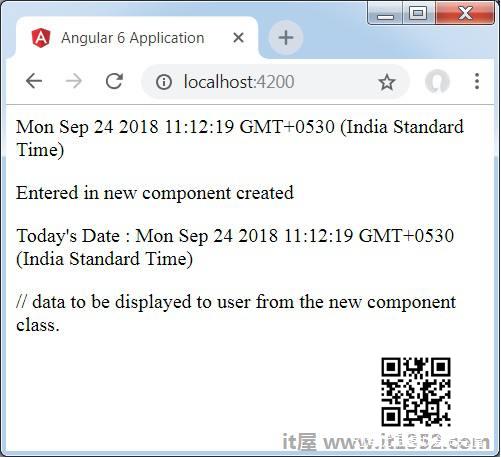
{{newcomponent}}
Today's Date : {{todaydate}}
新组件的选择器用于 app.component.html 文件.上面的html文件中的内容将显示在浏览器中,如下所示 :
如果在任何组件中更改服务的属性,则在其他组件中也会更改相同的属性.现在让我们看看它是如何工作的.
我们将在服务中定义一个变量,并在父组件和新组件中使用它.我们将再次更改父组件中的属性,并查看是否在新组件中更改了该属性.
在 myservice.service.ts 中,我们创建了一个属性,并在其他父组件和新组件中使用了相同的属性.
import { Injectable } from '@angular/core';@Injectable()export class MyserviceService { serviceproperty = "Service Created"; constructor() { } showTodayDate() { let ndate = new Date(); return ndate; }}现在让我们在其他组件中使用 serviceproperty 变量.在 app.component.ts 中,我们按以下方式访问变量 :
import { Component } from '@angular/core';import { MyserviceService } from './myservice.service';@Component({ selector: 'app-root', templateUrl: './app.component.html', styleUrls: ['./app.component.css']})export class AppComponent { title = 'Angular 4 Project!'; todaydate; componentproperty; constructor(private myservice: MyserviceService) {} ngOnInit() { this.todaydate = this.myservice.showTodayDate(); console.log(this.myservice.serviceproperty); this.myservice.serviceproperty = "component created"; // value is changed. this.componentproperty = this.myservice.serviceproperty; }}我们现在将获取变量并使用console.log.在下一行中,我们将变量的值更改为"component created".我们将在 new-cmp.component.ts 中执行相同操作.
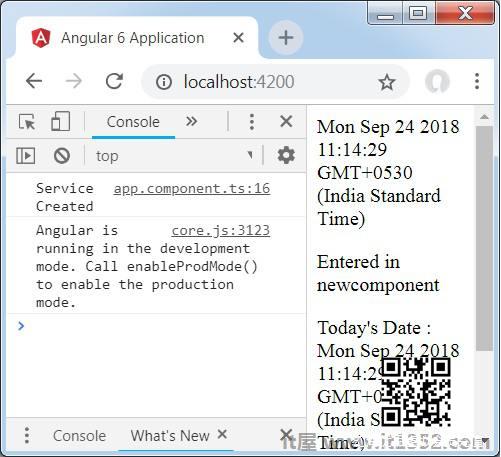
import { Component, OnInit } from '@angular/core';import { MyserviceService } from './../myservice.service';@Component({ selector: 'app-new-cmp', templateUrl: './new-cmp.component.html', styleUrls: ['./new-cmp.component.css']})export class NewCmpComponent implements OnInit { todaydate; newcomponentproperty; newcomponent = "Entered in newcomponent"; constructor(private myservice: MyserviceService) {} ngOnInit() { this.todaydate = this.myservice.showTodayDate(); this.newcomponentproperty = this.myservice.serviceproperty; }}在上面的组件中,除了直接将属性分配给组件属性之外,我们不会更改任何内容.
现在,当您在浏览器中执行它时,服务属性将被更改,因为它的值在 app.component.ts 中更改,并且将显示相同的值对于 new-cmp.component.ts .
在更改之前还要检查控制台中的值.