开发手册 欢迎您!
软件开发者资料库

MVC框架 - 高级示例

MVC框架高级示例 - 从简单和简单的步骤学习Web设计中的MVC框架,从基本到高级概念,包括简介,体系结构和流程,MVC和ASP.NET Web窗体,文件夹,模型,控制器,视图,布局,路由引擎,过滤器和动作过滤器,第一个应用程序,高级MVC示例,Ajax支持,异常处理,捆绑和缩小。

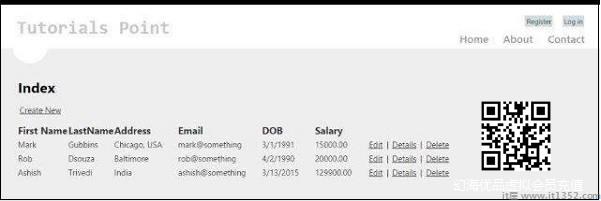
在第一章中,我们了解了控制器和视图如何在MVC中进行交互.在本教程中,我们将向前迈出一步,学习如何使用模型并创建一个高级应用程序来创建,编辑和删除.并查看我们的应用程序中的用户列表.

创建高级MVC应用程序

步骤1 : 选择File → 新的 → 项目 →  ASP.NET MVC Web应用程序.将其命名为AdvancedMVCApplication.单击确定.在下一个窗口中,选择Template as Internet Application,View Engine as Razor.注意我们这次使用的是模板,而不是空应用程序.

MVC New Internet Project

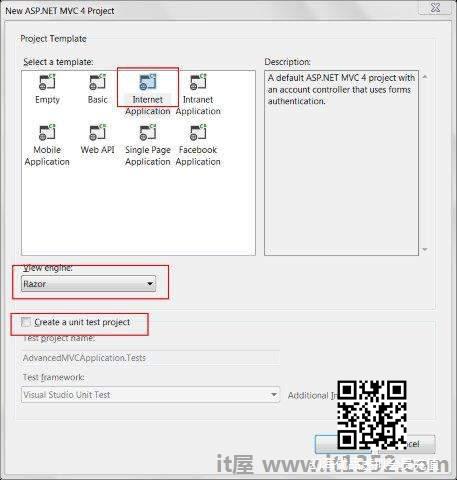
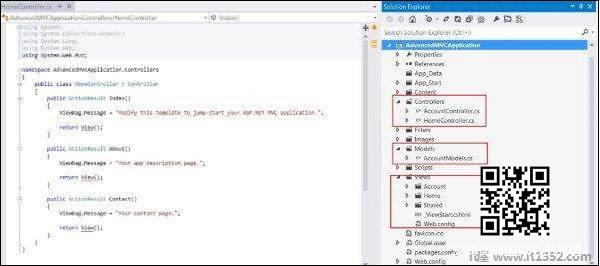
这将创建一个新的解决方案项目,如以下屏幕截图所示.由于我们使用的是默认的ASP.NET主题,因此它包含示例视图,控制器,模型和其他文件.

MVC模型视图控制器

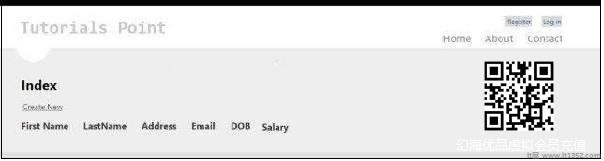
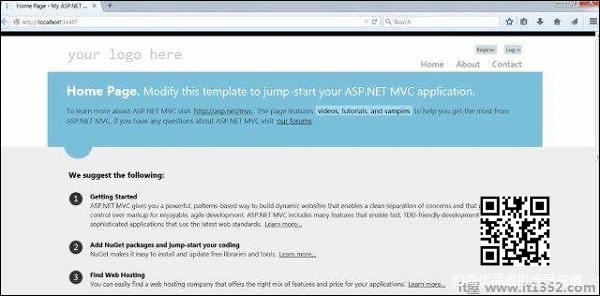
步骤2 : 构建解决方案并运行应用程序以查看其默认输出,如以下屏幕截图所示.

MVC示例Internet申请表

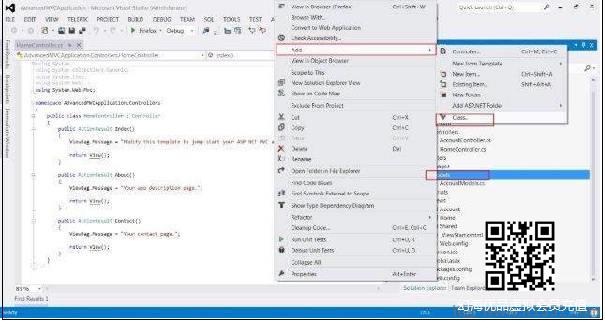
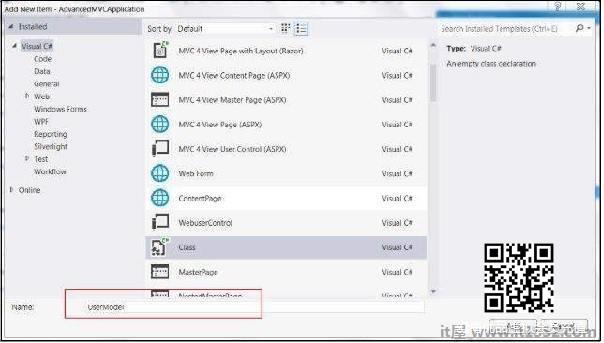
第3步 : 添加一个新模型,用于定义用户数据的结构.右键单击Models文件夹,然后单击Add → 类.将其命名为UserModel并单击Add.

MVC Add Model Step 1


MVC Add Model Step 2

第4步 : 使用System复制新创建的UserModel.cs中的以下代码.

using System; using System.ComponentModel; using System.ComponentModel.DataAnnotations; using System.Web.Mvc.Html;  namespace AdvancedMVCApplication.Models {    public class UserModels {          [Required]       public int Id { get; set; }       [DisplayName("First Name")]       [Required(ErrorMessage = "First name is required")]       public string FirstName { get; set; }        [Required]       public string LastName { get; set; }                public string Address { get; set; }                [Required]       [StringLength(50)]       public string Email { get; set; }                [DataType(DataType.Date)]       public DateTime DOB { get; set; }                [Range(100,1000000)]       public decimal Salary { get; set; }    } }

在上面的代码中,我们已经指定了User模型具有的所有参数,它们的数据类型和验证,例如必填字段和长度.

现在我们已准备好用户模型来保存数据,我们将创建一个类文件Users.cs,其中包含查看用户的方法,添加,编辑和删除用户.

第5步 : 右键单击Models并单击Add → 类.将其命名为Users.这将在Models中创建users.cs类.将以下代码复制到users.cs类中.

using System; using System.Collections.Generic; using System.EnterpriseServices;  namespace AdvancedMVCApplication.Models {       public class Users {       public List UserList = new List();              //action to get user details       public UserModels GetUser(int id) {          UserModels usrMdl = null;                    foreach (UserModels um in UserList)                         if (um.Id == id)                usrMdl = um;                return usrMdl;       }              //action to create new user       public void CreateUser(UserModels userModel) {          UserList.Add(userModel);       }              //action to udpate existing user       public void UpdateUser(UserModels userModel) {                   foreach (UserModels usrlst in UserList) {                         if (usrlst.Id == userModel.Id) {                usrlst.Address = userModel.Address;                usrlst.DOB = userModel.DOB;                usrlst.Email = userModel.Email;                usrlst.FirstName = userModel.FirstName;                usrlst.LastName = userModel.LastName;                usrlst.Salary = userModel.Salary;                break;             }          }       }              //action to delete exising user       public void DeleteUser(UserModels userModel) {                   foreach (UserModels usrlst in UserList) {                         if (usrlst.Id == userModel.Id) {                UserList.Remove(usrlst);                break;             }          }       }    } }

一旦我们拥有UserModel.cs和Users.cs,我们将为我们的模型添加视图,以便查看用户,添加,编辑和删除用户.首先让我们创建一个视图来创建用户.

第6步 : 右键单击Views文件夹,然后单击Add → 查看.

mvc_advanced_add_view

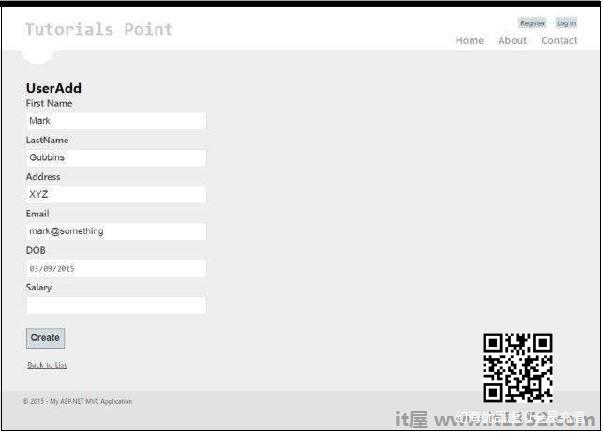
第7步  : 去;在下一个窗口中,选择View Name as UserAdd,View Engine as Razor并选择Create a strong-typed view复选框.

MVC高级用户添加视图

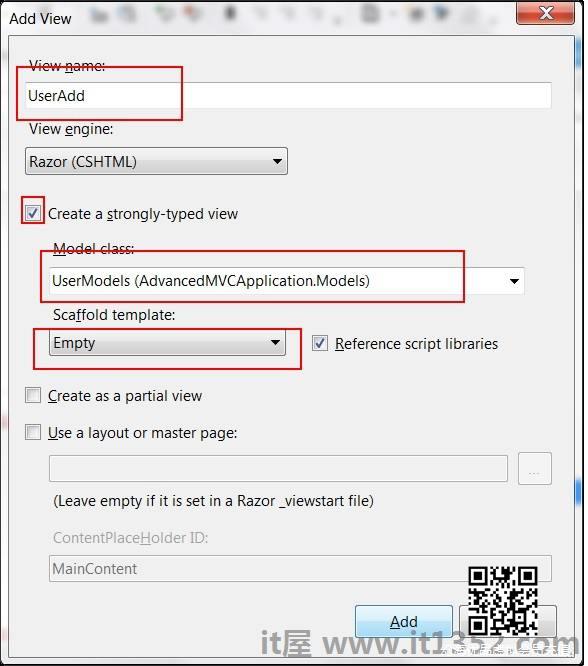
步骤8 : 单击添加.这将默认创建以下CSHML代码,如下所示 :

@model AdvancedMVCApplication.Models.UserModels  @{    ViewBag.Title = "UserAdd"; }

UserAdd

  @using (Html.BeginForm()) {    @Html.ValidationSummary(true)        
       UserModels                  @Html.LabelFor(model => model.FirstName)       
                    @Html.EditorFor(model => model.FirstName)          @Html.ValidationMessageFor(model => model.FirstName)       
                        @Html.LabelFor(model => model.LastName)                           @Html.EditorFor(model => model.LastName)          @Html.ValidationMessageFor(model => model.LastName)                               @Html.LabelFor(model => model.Address)                           @Html.EditorFor(model => model.Address)          @Html.ValidationMessageFor(model => model.Address)                               @Html.LabelFor(model => model.Email)                          @Html.EditorFor(model => model.Email)          @Html.ValidationMessageFor(model => model.Email)                               @Html.LabelFor(model => model.DOB)                           @Html.EditorFor(model => model.DOB)          @Html.ValidationMessageFor(model => model.DOB)                               @Html.LabelFor(model => model.Salary)                           @Html.EditorFor(model => model.Salary)          @Html.ValidationMessageFor(model => model.Salary)                     


     }  
    @Html.ActionLink("Back to List", "Index") 
  @section Scripts {       @Scripts.Render("~/bundles/jqueryval") }

如您所见,此视图包含字段所有属性的视图详细信息,包括其验证消息,标签等.此视图在我们的最终应用程序中将如下所示.

MVC高级应用程序1

与UserAdd类似,现在我们将添加以下四个视图给定的代码 :

Index.cshtml

此视图将在索引页面上显示我们系统中的所有用户.

@model IEnumerable  @{    ViewBag.Title = "Index"; }  

Index


    @Html.ActionLink("Create New", "UserAdd") 

                                                                                      @foreach (var item in Model) {                                                                                                                } 
          @Html.DisplayNameFor(model => model.FirstName)                 @Html.DisplayNameFor(model => model.LastName)                 @Html.DisplayNameFor(model => model.Address)                 @Html.DisplayNameFor(model => model.Email)                 @Html.DisplayNameFor(model => model.DOB)                 @Html.DisplayNameFor(model => model.Salary)       
            @Html.DisplayFor(modelItem => item.FirstName)                       @Html.DisplayFor(modelItem => item.LastName)                       @Html.DisplayFor(modelItem => item.Address)                       @Html.DisplayFor(modelItem => item.Email)                       @Html.DisplayFor(modelItem => item.DOB)                       @Html.DisplayFor(modelItem => item.Salary)                       @Html.ActionLink("Edit", "Edit", new { id = item.Id }) |             @Html.ActionLink("Details", "Details", new { id = item.Id }) |             @Html.ActionLink("Delete", "Delete", new { id = item.Id })          

此视图在我们的最终申请中将如下所示.

MVC高级应用程序2

Details.cshtml

此视图将在我们点击时显示特定用户的详细信息用户记录.

@model AdvancedMVCApplication.Models.UserModels  @{    ViewBag.Title = "Details"; }  

Details

  
    UserModels            @Html.DisplayNameFor(model => model.FirstName)                 @Html.DisplayFor(model => model.FirstName)                   @Html.DisplayNameFor(model => model.LastName)                 @Html.DisplayFor(model => model.LastName)                  @Html.DisplayNameFor(model => model.Address)                 @Html.DisplayFor(model => model.Address)                   @Html.DisplayNameFor(model => model.Email)                 @Html.DisplayFor(model => model.Email)                    @Html.DisplayNameFor(model => model.DOB)                 @Html.DisplayFor(model => model.DOB)                   @Html.DisplayNameFor(model => model.Salary)                 @Html.DisplayFor(model => model.Salary)       
  

   @Html.ActionLink("Edit", "Edit", new { id = Model.Id }) |    @Html.ActionLink("Back to List", "Index") 

此视图在我们的最终申请中将如下所示.

MVC高级应用程序详细信息

Edit.cshtml

此视图将显示编辑表单以编辑现有详细信息user.

@model AdvancedMVCApplication.Models.UserModels  @{    ViewBag.Title = "Edit"; }  

Edit

  @using (Html.BeginForm()) {    @Html.AntiForgeryToken()    @Html.ValidationSummary(true)        
       UserModels        @Html.HiddenFor(model => model.Id)                  @Html.LabelFor(model => model.FirstName)                           @Html.EditorFor(model => model.FirstName)          @Html.ValidationMessageFor(model => model.FirstName)                               @Html.LabelFor(model => model.LastName)                           @Html.EditorFor(model => model.LastName)          @Html.ValidationMessageFor(model => model.LastName)                               @Html.LabelFor(model => model.Address)                           @Html.EditorFor(model => model.Address)          @Html.ValidationMessageFor(model => model.Address)                               @Html.LabelFor(model => model.Email)                           @Html.EditorFor(model => model.Email)          @Html.ValidationMessageFor(model => model.Email)                               @Html.LabelFor(model => model.DOB)                          @Html.EditorFor(model => model.DOB)          @Html.ValidationMessageFor(model => model.DOB)                               @Html.LabelFor(model => model.Salary)                           @Html.EditorFor(model => model.Salary)          @Html.ValidationMessageFor(model => model.Salary)                     


 }  
    @Html.ActionLink("Back to List", "Index") 
  @section Scripts {    @Scripts.Render("~/bundles/jqueryval") }

此视图在我们的应用程序中将如下所示.

MVC高级应用程序详细信息

Delete.cshtml

此视图将显示删除现有用户的表单.

@model AdvancedMVCApplication.Models.UserModels  @{    ViewBag.Title = "Delete"; } 

Delete


Are you sure you want to delete this?

  
    UserModels            @Html.DisplayNameFor(model => model.FirstName)                 @Html.DisplayFor(model => model.FirstName)                   @Html.DisplayNameFor(model => model.LastName)                 @Html.DisplayFor(model => model.LastName)                   @Html.DisplayNameFor(model => model.Address)                 @Html.DisplayFor(model => model.Address)                   @Html.DisplayNameFor(model => model.Email)                 @Html.DisplayFor(model => model.Email)                   @Html.DisplayNameFor(model => model.DOB)                 @Html.DisplayFor(model => model.DOB)                   @Html.DisplayNameFor(model => model.Salary)                @Html.DisplayFor(model => model.Salary)     
  @using (Html.BeginForm()) {    @Html.AntiForgeryToken()       

        |       @Html.ActionLink("Back to List", "Index")    

 }

此视图在我们的最终申请中将如下所示.

MVC高级申请详情删除

第9步 : 我们已经在我们的应用程序中添加了模型和视图.最后我们将为我们的视图添加一个控制器.右键单击Controllers文件夹,然后单击Add → 控制器.将其命名为UserController.

MVC Advanced Add Controller

默认情况下,您的Controller类将使用以下代码创建 :

using System; using System.Collections.Generic; using System.Linq; using System.Web; using System.Web.Mvc; using AdvancedMVCApplication.Models;  namespace AdvancedMVCApplication.Controllers {        public class UserController : Controller {       private static Users _users = new Users();             public ActionResult Index() {          return View(_users.UserList);       }    } }

在上面的代码中,将在渲染用户列表时使用Index方法在索引页面上.

第10步 : 右键单击Index方法并选择Create View为我们的Index页面创建一个View(它将列出所有用户并提供创建新用户的选项).

MVC高级添加索引视图

步骤11 : 现在在UserController.cs中添加以下代码.在这段代码中,我们正在为不同的用户操作创建操作方法,并返回我们之前创建的相应视图.

我们将为每个操作添加两个方法:GET和POST.在获取数据并呈现数据时将使用HttpGet. HttpPost将用于创建/更新数据.例如,当我们添加新用户时,我们需要一个表单来添加用户,这是一个GET操作.填写表单并提交这些值后,我们将需要POST方法.

//Action for Index View  public ActionResult Index() {    return View(_users.UserList); }  //Action for UserAdd View [HttpGet] public ActionResult UserAdd() {    return View(); }  [HttpPost] public ActionResult UserAdd(UserModels userModel) {    _users.CreateUser(userModel);    return View("Index", _users.UserList); }  //Action for Details View [HttpGet] public ActionResult Details(int id) {    return View(_users.UserList.FirstOrDefault(x => x.Id == id)); }  [HttpPost] public ActionResult Details() {    return View("Index", _users.UserList); }  //Action for Edit View [HttpGet] public ActionResult Edit(int id) {    return View(_users.UserList.FirstOrDefault(x=>x.Id==id)); } [HttpPost] public ActionResult Edit(UserModels userModel) {    _users.UpdateUser(userModel);    return View("Index", _users.UserList); }         //Action for Delete View [HttpGet] public ActionResult Delete(int id) {    return View(_users.UserList.FirstOrDefault(x => x.Id == id)); }  [HttpPost] public ActionResult Delete(UserModels userModel) {    _users.DeleteUser(userModel);    return View("Index", _users.UserList); } sers.UserList);

第12步 : 最后要做的是转到App_Start文件夹中的RouteConfig.cs文件并将默认Controller更改为User.

defaults: new { controller = "User", action = "Index", id = UrlParameter.Optional }

这就是我们启动和运行高级应用程序所需的一切.

第13步 : 现在运行应用程序.您将能够看到以下屏幕截图中显示的应用程序.您可以执行添加,查看,编辑和删除用户的所有功能,如我们在早期的屏幕截图中所见.

MVC高级添加索引最终